
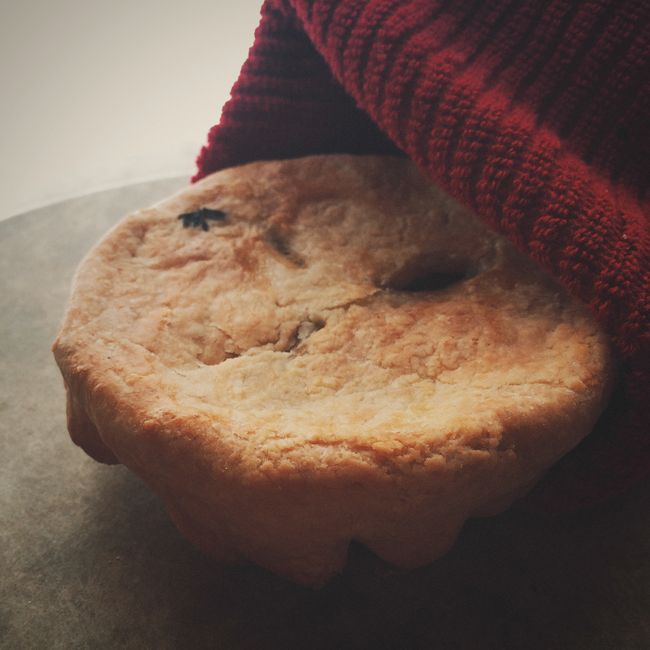
Flaky Food Processor Pie Crust
Achieving the Ultimate Flaky Food Processor Pie Crust: A Masterclass in Texture and Flavor
Mastering a truly flaky pie crust is a culinary cornerstone, and the food processor can be an indispensable tool in achieving that perfect, tender, and shatteringly crisp texture. While some purists might favor hand-mixing or a pastry blender, the food processor, when used judiciously, offers unparalleled efficiency and consistency, especially for busy home bakers. The key lies in understanding the science behind flakiness and how the food processor’s mechanics interact with the fundamental ingredients: flour, fat, and water. Overworking the dough is the primary enemy of flakiness, leading to a tough, bread-like texture. The food processor, with its high-speed blades, can quickly develop gluten, which we want to minimize. Therefore, strategic pulsing and precise fat incorporation are paramount. The goal is to create a dough where pieces of cold fat are coated in flour, but not entirely integrated. When baked, these fat pockets melt, leaving behind tiny air pockets that separate the layers of dough, resulting in that coveted flakiness. Understanding the role of each ingredient and the temperature at which they are kept is critical. Cold fat is non-negotiable; it needs to remain solid until it hits the heat of the oven to create steam and separation. Ice water, similarly, keeps the fat cold and prevents excessive gluten development in the flour.
The choice of fat significantly impacts both flakiness and flavor. All-butter pie crusts offer superior flavor but can be more challenging to work with due to butter’s lower melting point. Lard, historically the champion of flakiness, provides an incredibly tender and shatteringly crisp crust but lacks the nuanced flavor of butter. Vegetable shortening is a good all-rounder, offering excellent flakiness and a neutral flavor, making it a popular choice for those seeking consistent results without compromising texture. A combination of fats, such as butter and shortening, can often provide the best of both worlds: the flavor of butter with the superior flakiness and ease of handling offered by shortening. When using the food processor, the size of the fat pieces is crucial. Aim for pea-sized to dime-sized pieces of fat distributed throughout the flour. This ensures that there are distinct pockets of fat to create those airy layers. Over-processing will break down the fat into too-small pieces, leading to a more uniform, less flaky texture. The pulsed action of the food processor is designed to mimic the effect of cutting in fat with a pastry blender, but it’s vital to monitor the consistency closely.
The amount of water in a pie crust recipe is another critical factor. Too much water will activate more gluten, resulting in a tough crust. Too little water will make the dough crumbly and difficult to roll out. The food processor helps in distributing the water evenly, but it’s essential to add it gradually and only until the dough just comes together. The dough should be shaggy and not form a cohesive ball when you pinch it. This slight shagginess indicates that the gluten hasn’t been overdeveloped and that there are still distinct pieces of fat waiting to create flakiness. The food processor’s pulse function is your best friend here. Add the ice water a tablespoon at a time, pulsing briefly after each addition, until the dough starts to clump together. You should be able to pinch a few pieces of dough together and have them hold their shape, but it shouldn’t be smooth or sticky. This delicate balance is key to achieving a tender and flaky outcome.
Troubleshooting Common Food Processor Pie Crust Issues: Embracing the Imperfect for Perfection
One of the most frequent problems encountered with food processor pie crusts is toughness. This almost invariably stems from overworking the dough, which develops too much gluten. The food processor, with its speed and efficiency, can easily fall prey to this pitfall. To avoid toughness, be vigilant about the pulse setting. Instead of letting the processor run continuously, use short, sharp pulses. Stop the processor the moment the ingredients begin to come together. If you see the dough starting to form a cohesive ball, it’s likely already too late to achieve maximum flakiness. Another sign of overworking is a dough that feels sticky or elastic. If your dough is becoming tough, consider incorporating a small amount of extra fat (like a teaspoon of melted butter or shortening) and gently working it in without extensive processing. However, prevention is far more effective than cure. Always err on the side of under-processing when using a food processor for pie crust.
Another common issue is a crumbly or dry dough that’s difficult to roll. This usually indicates insufficient water. While it’s tempting to add more water liberally, do so with extreme caution. Add it a teaspoon at a time, pulsing briefly after each addition, until the dough just begins to hold together. The dough should not be wet or sticky; it should simply clump when squeezed. If the dough is already too dry and crumbly after initial processing, you can try adding a tablespoon of ice water and pulsing again, but be mindful that this can still lead to toughness if not done carefully. Sometimes, even with careful measurement, the flour itself can absorb moisture differently, requiring slight adjustments. It’s also important to remember that the dough needs to rest. Chilling the dough in the refrigerator for at least 30 minutes (and ideally longer) allows the gluten to relax, making it more pliable and less likely to shrink during baking. This rest period is crucial for both texture and ease of handling.
A less common but frustrating problem is a crust that shrinks excessively during baking. This is often due to overworking the dough, which activates the gluten’s elasticity. When the gluten is tight, it will contract when exposed to heat. Proper chilling of the dough before rolling and baking is essential to relax the gluten. Additionally, be careful not to stretch the dough excessively when lining your pie plate. Gently pressing it into the corners is better than pulling and stretching. Using a weighted pie crust shield or pie weights during the initial blind baking phase can also help prevent shrinkage. If you notice the edges starting to brown too quickly during baking, you can loosely tent the edges with foil. The goal is to bake the crust evenly without compromising its structure.
The Art and Science of Food Processor Pie Crust Ingredients: A Foundation for Flakiness
The foundation of any flaky pie crust lies in the quality and temperature of its ingredients. For a food processor pie crust, this is even more critical due to the inherent speed and potential for over-processing. The flour is the structural component. All-purpose flour is the most common choice, providing a good balance of protein for structure and extensibility. For a slightly more tender crust, you can use a blend of all-purpose and cake flour, as cake flour has a lower protein content. The fat is the key to flakiness. As previously mentioned, the type and temperature of the fat are paramount. Using butter that is thoroughly chilled and cut into small cubes is ideal. Shortening, being more stable at room temperature, can offer a more forgiving experience. For optimal results, consider a combination of both. Ensure your fat is as cold as possible. You can even freeze your fat pieces for 10-15 minutes before processing.
The liquid used to bind the dough is equally important. Ice water is the universal recommendation. The cold temperature of the water keeps the fat solid and minimizes gluten development. Some recipes call for a small amount of vinegar or lemon juice. These acidic ingredients help to tenderize the dough by breaking down gluten strands, contributing to a more delicate texture. When adding the water to the food processor, do so gradually. The food processor will distribute the water more evenly than hand mixing, so you need less liquid overall. Start with the lower end of the recommended water amount in your recipe and add more only as needed, pulsing briefly after each addition, until the dough just starts to clump. You are looking for a shaggy dough that holds together when squeezed, not a smooth, cohesive ball.
Salt is a flavor enhancer and also plays a role in gluten development. It tightens gluten strands, which can contribute to a sturdier crust, but in moderation, it enhances the overall taste. Sugar, if used, adds a subtle sweetness and helps with browning. However, for a truly classic flaky pie crust where the focus is on texture and the filling’s flavor, sugar is often omitted or used in very small quantities. The processor’s ability to quickly and evenly distribute these dry ingredients before the fat is added ensures a uniform base for the fat to work its magic.
Food Processor Pie Crust Technique: Mastering the Pulse and the Chill
The food processor offers a streamlined approach to pie crust making, but it demands a specific technique to leverage its strengths and mitigate its weaknesses. Begin by placing your dry ingredients – flour, salt, and any sugar – into the bowl of the food processor. Pulse several times to combine thoroughly. This ensures even distribution of salt and any leavening agents if your recipe includes them. Next, add your chilled, cubed fat. This is where precision is crucial. Pulse in short bursts, about 5-10 seconds each, checking the consistency after each pulse. The goal is to break down the fat into pieces ranging in size from small peas to roughly the size of a dime, with some larger pieces still visible. You are not aiming for a uniform paste. The fat should be coated in flour, creating distinct pockets. If you are using a combination of butter and shortening, add them together.
Once the fat is incorporated to your liking, it’s time for the liquid. Drizzle the ice water (and vinegar/lemon juice if using) around the edges of the food processor bowl while the machine is off. Then, pulse the dough in short bursts, again 5-10 seconds at a time. Watch the dough carefully. It will start to look shaggy and then begin to clump together. Stop pulsing the moment the dough just starts to form a few large clumps and looks like it’s beginning to hold together when squeezed. You should not have a smooth, cohesive ball. If you accidentally add too much water and the dough becomes sticky, resist the urge to add more flour. Instead, place the dough on a lightly floured surface and gently fold and gather it, trying to avoid overworking it.
The crucial next step is chilling. Turn the dough out onto a lightly floured surface and gently bring it together into a rough disc. Do not knead. Divide the dough if making a double-crust pie and flatten each portion into a disc. Wrap the discs tightly in plastic wrap. Refrigerate for at least 30 minutes, and ideally for 1-2 hours. This resting period is vital. It allows the gluten to relax, making the dough easier to roll and preventing shrinkage during baking. It also allows the fat to firm up again, which is essential for creating steam and separation during baking.
When ready to roll, allow the chilled dough to sit at room temperature for about 5-10 minutes if it’s too firm to roll. Flour your work surface and rolling pin lightly. Roll the dough from the center outwards, rotating the dough frequently to maintain a circular shape and prevent sticking. If the dough cracks, you can gently press it back together or patch it with a small piece of dough. For blind baking, carefully transfer the rolled dough into your pie plate, pressing it gently into the corners. Trim and crimp the edges as desired. Prick the bottom of the crust with a fork to prevent puffing. For blind baking, line the crust with parchment paper or foil and fill with pie weights, dried beans, or rice. Bake according to your recipe’s instructions.
The Science of Food Processor Pie Crust Flakiness: Unpacking the Mechanics of Texture
The pursuit of a flaky pie crust, particularly when employing a food processor, is rooted in a fundamental understanding of thermodynamics and ingredient interactions. Flakiness is not merely a desirable outcome; it’s a tangible structural phenomenon. At its core, flakiness is achieved when distinct layers of dough are separated by pockets of fat. During baking, these fat pockets melt, creating steam. This steam, trapped within the dough layers, causes them to puff and separate, resulting in the characteristic flaky texture. The food processor, when used correctly, excels at creating these necessary fat pockets.
The cold temperature of the fat is paramount. When cold fat hits the heat of the oven, it melts rapidly. If the fat is too warm, it will incorporate too smoothly into the flour, diminishing the formation of distinct pockets. The food processor’s blades, through pulsed action, cut the fat into the flour, creating irregular pieces. The goal is to coat these fat pieces with flour without over-integrating them. This ensures that the fat remains in discrete chunks throughout the dough matrix. If the food processor is run for too long, the fat will be broken down into very small particles, approaching a paste-like consistency. This over-processing leads to a more homogenous distribution of fat, which results in a tender but less distinctly flaky crust.
The role of water is to hydrate the flour and initiate gluten development. Gluten provides structure to the dough, but excessive gluten development leads to toughness. The food processor’s efficiency means it can hydrate the flour quickly. Therefore, adding water in small increments and pulsing only until the dough just begins to come together is crucial. The shaggy, slightly under-hydrated appearance of the dough is a sign that gluten development has been minimized, leaving the fat free to create those flaky layers. The ice-cold temperature of the water further counteracts any heat generated by the food processor’s motor and blades, keeping the fat cold and the gluten development in check.
The resting period in the refrigerator after mixing and before rolling is also scientifically important. During this time, the gluten strands that have been formed begin to relax and relax. This makes the dough more pliable and easier to roll without tearing or excessive stretching. If the dough is rolled while the gluten is still "tight" and unrelaxed, it will contract significantly when exposed to the heat of the oven, leading to shrinkage. Furthermore, chilling allows the fat to re-solidify, ensuring that it will melt and create steam during baking. This interplay of ingredient temperatures, precise fat distribution, minimal gluten development, and proper resting periods are the scientific underpinnings of achieving a perfectly flaky food processor pie crust.
Elevating Your Pie Crust Game: Advanced Tips and Variations for Food Processor Enthusiasts
For those seeking to push the boundaries of their food processor pie crust, exploring different fat combinations and techniques can yield exceptional results. A classic and highly regarded combination involves using both all-butter and a high-quality leaf lard. Butter provides unparalleled flavor, while leaf lard, known for its neutral taste and superior flakiness, offers an almost ethereal crispness. When using this blend in the food processor, ensure both fats are very cold and cut into similar-sized pieces. The pulsed action will distribute them effectively, creating a complex layering effect. The butter will melt and contribute to a rich, nutty aroma, while the lard will create incredibly tender and shatteringly crisp layers.
Consider incorporating a small amount of vodka into your liquid. Vodka is roughly 40% alcohol and 60% water. Alcohol interferes with gluten development, and because it evaporates quickly during baking, it contributes to a drier, more tender, and ultimately flakier crust. Use it in place of an equal amount of the ice water in your recipe, and still add it gradually while pulsing. Be mindful that the flavor of vodka is imperceptible in the final baked product.
For those who enjoy a slightly more rustic texture or a visually appealing crust, a whole wheat or spelt flour blend can be introduced. Start with a small percentage (10-20%) of whole wheat or spelt flour, as these flours have a higher gluten content and can result in a tougher crust if used in large quantities. The food processor can help to break down the bran in whole grains, but it’s still crucial to be extra vigilant about not overworking the dough. The nutty flavor of these grains can complement a variety of pie fillings, adding another dimension to your baking.
Blind baking is a technique that can significantly improve the texture of pies with wet fillings. When blind baking with a food processor crust, ensure the dough is well-chilled before lining the pie plate. This helps prevent shrinkage. After lining the plate, prick the bottom thoroughly with a fork. For an extra crisp bottom, some bakers advocate for a light egg wash on the bottom of the crust before adding the parchment and weights. This creates a barrier that prevents the filling from making the bottom crust soggy.
Finally, don’t underestimate the power of practice and observation. Each flour, each fat, and even the ambient temperature of your kitchen can slightly alter the dough’s consistency. Learn to "read" your dough. It should be shaggy, with visible pieces of fat. It should hold together when gently squeezed but not be sticky. The food processor is a tool that, when understood and used with intention, can consistently produce exceptionally flaky pie crusts, opening up a world of delicious possibilities.
