
Instant Pot Pumpkin Puree
Instant Pot Pumpkin Puree: The Ultimate Guide to Perfect, Homemade Pumpkin Puree
Creating fresh, homemade pumpkin puree using an Instant Pot is a straightforward and efficient process, yielding a superior product compared to canned alternatives in both flavor and texture. This method is ideal for anyone looking to elevate their fall baking, cooking, and even beverage creations with the pure, unadulterated taste of pumpkin. The Instant Pot’s pressurized cooking environment rapidly breaks down the pumpkin flesh, resulting in a smooth, velvety puree that’s perfect for pies, soups, breads, and more. Unlike oven-roasting, which can sometimes lead to uneven cooking or drying out of the pumpkin, the Instant Pot ensures consistent, moist heat distribution, making the process foolproof. Furthermore, by making your own puree, you gain complete control over the ingredients, avoiding any added sugars, preservatives, or thickeners often found in store-bought versions. This guide will walk you through the entire process, from selecting the right pumpkin to storing your finished puree, ensuring you achieve optimal results every time.
Selecting the Optimal Pumpkin for Puree
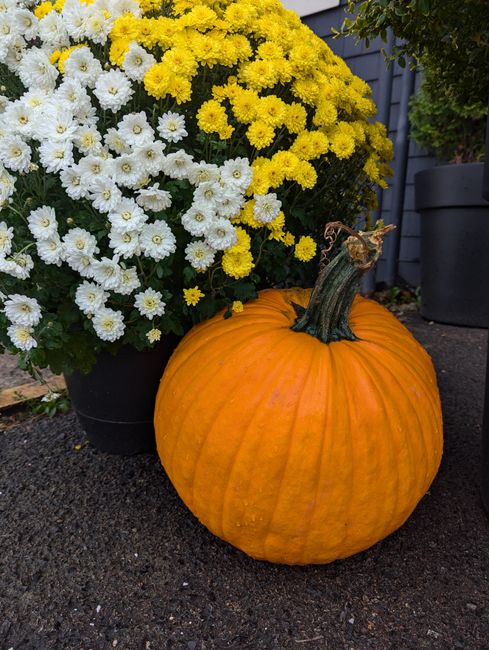
The success of your Instant Pot pumpkin puree hinges significantly on the type of pumpkin you choose. Not all pumpkins are created equal, and opting for the right variety will dramatically impact the flavor, texture, and sugar content of your puree. Avoid the large, decorative pumpkins typically found in patches for carving. These, often referred to as "sugar pumpkins" or "pie pumpkins," are bred for their sweetness and smooth flesh, making them the ideal candidates for puree. Smaller pumpkins, generally weighing between 3-6 pounds, are preferable. Their flesh is denser, less watery, and boasts a more concentrated, richer pumpkin flavor. Look for pumpkins that are firm to the touch, with smooth, unblemished skin. A deep, uniform orange color is usually indicative of ripeness and good flavor. Avoid any pumpkins with soft spots, mold, or excessive scarring, as these can negatively affect the taste and storage life of your puree. Varieties like Cinderella, Baby Bear, and Kabocha squash (though technically a squash, it functions similarly in terms of puree quality and is often used interchangeably) are excellent choices. Their natural sweetness means you won’t need to add any extra sugar to your recipes, allowing the pure pumpkin flavor to shine. The weight of the pumpkin is also a good indicator of yield; a 4-pound pumpkin will yield approximately 2-3 cups of puree. It’s always wise to buy more than you think you’ll need, especially if you plan on making multiple batches or freezing some for later use. Consider visiting a local farmer’s market for the freshest, most flavorful options.
Preparing the Pumpkin for the Instant Pot
Proper preparation is crucial for a successful Instant Pot pumpkin puree. Begin by thoroughly washing the exterior of your chosen pumpkin under cool running water. This removes any dirt, debris, or potential contaminants. Next, using a sturdy, sharp chef’s knife, carefully cut the pumpkin in half from stem to blossom end. This can be a bit challenging with denser pumpkins, so ensure you have a stable cutting surface and proceed with caution. Once halved, use a spoon to scoop out all the seeds and stringy pulp from the center of each half. You can discard this material or save the seeds for roasting separately. For the Instant Pot method, it’s generally not necessary to peel the pumpkin before cooking. The skin will soften considerably during the pressurized cooking process and can be easily removed once the pumpkin is cooked. However, some prefer to cut the pumpkin into more manageable, smaller pieces before cooking, such as quarters or even smaller chunks. This can speed up the cooking time slightly and make it easier to fit multiple pieces into the Instant Pot. If you choose to cut it into smaller pieces, ensure each piece still has a good amount of flesh attached to the rind. The goal is to have pieces that are easy to handle and fit within the Instant Pot liner without overcrowding.
The Instant Pot Cooking Process
The beauty of using an Instant Pot for pumpkin puree lies in its speed and efficiency. To begin, place the prepared pumpkin halves (or pieces) cut-side down into the Instant Pot liner. If the pieces are quite large, you might need to arrange them creatively to maximize space. Add approximately one cup of water to the bottom of the Instant Pot liner. This water is essential for creating the steam needed for pressure cooking. Do not add more water than recommended, as excessive water can make the pumpkin mushy or dilute the flavor. Secure the lid, ensuring the steam release valve is set to the "Sealing" position. Select the "Manual" or "Pressure Cook" setting on your Instant Pot and set the cooking time. For most medium-sized pie pumpkins (around 3-4 pounds), 8-12 minutes of high-pressure cooking is sufficient. The exact time may vary depending on the size and density of your pumpkin. It’s always better to start with a shorter cooking time and add more if needed than to overcook. Once the cooking cycle is complete, allow for a natural pressure release (NPR) for at least 10 minutes. This allows the pressure to subside gradually, which helps to further tenderize the pumpkin flesh. After 10 minutes of NPR, you can carefully perform a quick release (QR) to vent any remaining steam.
Processing the Cooked Pumpkin
Once the pressure has fully released and it is safe to open the lid, carefully remove the cooked pumpkin pieces from the Instant Pot. You will notice that the flesh is incredibly tender. Allow the pumpkin to cool slightly before handling. The skin should now peel away effortlessly. You can simply use your hands or a spoon to scrape the soft flesh away from the rind. Discard the skin. At this point, you will have beautifully cooked, vibrant orange pumpkin flesh. The next step is to create the puree. For a smoother texture, transfer the cooked pumpkin flesh to a food processor or blender. You can add a tablespoon or two of water or pumpkin’s own released liquid if the mixture seems too dry, but avoid adding too much, as this can lead to a watery puree. Process the pumpkin until it reaches your desired consistency. For most baking applications, a very smooth puree is preferred. For other uses, a slightly chunkier texture might be acceptable. If you don’t have a food processor or blender, you can use a potato masher or a fork to mash the pumpkin, though achieving a completely smooth consistency will be more challenging. The goal is to have a homogenous, lump-free puree that resembles the consistency of canned pumpkin.
Storing Your Homemade Pumpkin Puree
Proper storage is key to maximizing the shelf life of your homemade Instant Pot pumpkin puree. Once your puree has cooled completely, it can be stored in an airtight container in the refrigerator for up to 5 days. For longer-term storage, freezing is the most effective method. There are several ways to freeze your puree, depending on how you plan to use it later.
-
In Portion-Controlled Bags or Containers: Spoon the cooled puree into freezer-safe bags or small airtight containers. For bags, press out as much air as possible before sealing to prevent freezer burn. Label each bag or container with the date and the amount of puree (e.g., "1 cup pumpkin puree – 10/26/2023"). This is ideal if you know you’ll be using specific amounts for recipes.
-
In Ice Cube Trays: This is a fantastic method for smaller, pre-portioned servings. Spoon the puree into the compartments of an ice cube tray and freeze until solid. Once frozen, transfer the pumpkin cubes to a freezer-safe bag or container. This is perfect for adding to smoothies, sauces, or small baked goods where only a small amount of puree is needed.
-
In Freezer Jars: If you prefer using glass, ensure you use wide-mouth canning jars designed for freezing. Leave about an inch of headspace at the top to allow for expansion during freezing.
Properly frozen pumpkin puree can last for up to 6 months in the freezer without a significant loss of quality or flavor. When you’re ready to use frozen puree, transfer the desired amount to the refrigerator to thaw overnight. You can also thaw it more quickly by placing the sealed container in a bowl of lukewarm water.
Troubleshooting Common Issues
While the Instant Pot method for pumpkin puree is generally foolproof, a few common issues might arise.
-
Watery Puree: This can occur if too much water was added to the Instant Pot, or if the pumpkin was excessively watery to begin with. To remedy this, place the cooked pumpkin flesh in a fine-mesh sieve lined with cheesecloth over a bowl. Allow excess liquid to drain for an hour or two. You can also gently press out some of the moisture. If you’re using the puree for baking, you might need to slightly adjust the liquid in your recipe.
-
Grainy Texture: This usually happens if the pumpkin was undercooked or if it wasn’t processed long enough. Ensure the pumpkin is fork-tender before processing. If you’re using a food processor, process for a longer duration until smooth. Some pumpkin varieties naturally have a slightly more fibrous texture; in such cases, straining the puree through a fine-mesh sieve after processing can help achieve a smoother result.
-
Undercooked Pumpkin: If your pumpkin is still firm after the initial cooking time, don’t worry. Simply add a few more minutes of high-pressure cooking. Remember to allow for pressure release after the additional cooking time. It’s always better to err on the side of undercooking and adding more time, as overcooked pumpkin can become too mushy and difficult to handle.
-
Burn Notice: Occasionally, the "Burn" notice can appear on the Instant Pot. This is typically caused by food sticking to the bottom of the liner, often due to insufficient liquid. Ensure you have the correct amount of water in the pot. If the burn notice appears, carefully release pressure, remove the pumpkin, and check the bottom of the liner. Scrape off any burnt bits and clean the liner thoroughly before continuing with the cooking process. You may need to add fresh water and restart the cooking cycle.
Nutritional Benefits and Culinary Applications
Homemade Instant Pot pumpkin puree is not only delicious but also incredibly nutritious. Pumpkins are a rich source of beta-carotene, which the body converts into vitamin A, essential for vision, immune function, and skin health. They also provide vitamin C, potassium, and fiber. Unlike canned versions that may contain added sugars or preservatives, your homemade puree is pure, unadulterated goodness.
The culinary applications for your homemade pumpkin puree are vast and varied.
-
Baking: This is perhaps the most popular use. Pumpkin pie, pumpkin bread, pumpkin muffins, pumpkin cookies, and pumpkin cheesecake all benefit immensely from fresh puree. The natural sweetness and earthy flavor are unparalleled.
-
Savory Dishes: Don’t limit yourself to sweets! Pumpkin puree can add a creamy, subtle sweetness to savory dishes. Stir it into risotto, pasta sauces, or use it as a base for creamy pumpkin soup. It’s also excellent in curries or as a binder in vegetarian burgers.
-
Beverages: A staple in many fall coffee drinks, pumpkin puree adds a warm, comforting flavor to lattes, smoothies, and even cocktails.
-
Baby Food: Pureed pumpkin is an excellent and nutritious first food for infants, providing essential vitamins and minerals.
By mastering the art of Instant Pot pumpkin puree, you unlock a world of seasonal flavors and healthy cooking possibilities, allowing you to savor the essence of autumn in every bite. The convenience and superior quality of homemade puree make it a worthwhile endeavor for any home cook.
