
Simple Chocolate Covered Strawberries
The Art of Simple Chocolate Covered Strawberries: A Comprehensive Guide
Chocolate covered strawberries represent a classic indulgence, a delightful fusion of sweet, tart, and rich that appeals to a broad audience. Achieving perfection with this seemingly simple treat relies on understanding key principles of ingredient selection, technique, and troubleshooting. This guide delves into every aspect of creating exceptional chocolate covered strawberries, ensuring both novice and experienced creators can elevate their creations.
The foundation of outstanding chocolate covered strawberries lies in the quality of the ingredients. This begins with the strawberries themselves. Opt for ripe, firm strawberries with vibrant red color and green, perky stems. Avoid berries that are bruised, overly soft, or have any signs of mold, as these will compromise both the flavor and the appearance of the finished product. Washing the strawberries is a crucial step, but it must be done correctly. Gently rinse them under cool running water, taking care not to bruise them. Pat them thoroughly dry with paper towels. Moisture is the arch-nemesis of melted chocolate; even a small amount of water can cause the chocolate to seize, resulting in a clumpy, unworkable mess. Allow the strawberries to air dry for at least 30 minutes to an hour, or until you are absolutely certain they are bone dry. This drying period is non-negotiable for a smooth, glossy chocolate coating.
The choice of chocolate is equally paramount. While milk chocolate is a popular choice, dark chocolate often offers a more sophisticated flavor profile that beautifully complements the sweetness of the strawberries. High-quality couverture chocolate is recommended, as it contains a higher percentage of cocoa butter, which leads to a smoother texture and a superior sheen when melted. Compound chocolate, often found in candy melts, is an alternative that doesn’t require tempering and is simpler to work with, but it generally lacks the depth of flavor and snap of true chocolate. For this guide, we will primarily focus on using couverture chocolate, as it yields the most professional and delicious results. When selecting couverture, consider the cocoa percentage. For a rich, intense flavor, aim for 60-70% cocoa solids. If a sweeter profile is desired, a 50-55% cocoa dark chocolate or a good quality milk chocolate can be used. White chocolate is another option, but its higher sugar content can sometimes make it prone to burning if not handled with care.
Melting the chocolate requires a gentle approach to prevent scorching. The most reliable method is the double boiler. Fill a saucepan with about an inch of water and bring it to a simmer over medium-low heat. Place a heatproof bowl (glass or stainless steel) over the saucepan, ensuring the bottom of the bowl does not touch the water. Add your chopped chocolate to the bowl. Stir the chocolate constantly with a silicone spatula until it is almost completely melted. Remove the bowl from the heat and continue stirring as the residual heat will melt the remaining pieces. This controlled melting process prevents the chocolate from overheating and developing an unpleasant burnt flavor or seizing. Alternatively, microwave melting can be employed, but it demands extreme caution. Use a microwave-safe bowl and heat the chocolate in 20-second intervals, stirring thoroughly between each interval. This method is faster but carries a higher risk of burning if not monitored closely.
Once the chocolate is smoothly melted, its consistency needs to be optimized for dipping. For chocolate to adhere well to the strawberries and set with a smooth finish, it needs to be tempered. Tempering is a process that stabilizes the cocoa butter crystals within the chocolate, resulting in a glossy finish, a satisfying snap when bitten, and resistance to melting at room temperature. While tempering can seem daunting, it’s achievable with a bit of practice. The most common and accessible method for home cooks is the seeding method. Melt about two-thirds of your chocolate using the double boiler or microwave method. Once melted, remove it from the heat and add the remaining one-third of finely chopped chocolate (the "seed" chocolate) to the melted chocolate. Stir continuously until the seed chocolate is fully incorporated and the mixture reaches a smooth, flowing consistency. The temperature is crucial here. For dark chocolate, aim for a working temperature of around 88-90°F (31-32°C). For milk chocolate, it’s around 85-86°F (29-30°C), and for white chocolate, around 82-83°F (28°C). Using a candy thermometer is highly recommended for accuracy. If the chocolate cools down too much during dipping, you can gently rewarm it over the double boiler for a few seconds, being careful not to overheat.
The dipping process itself requires a steady hand and efficient technique. Hold a strawberry by its stem and carefully dip it into the melted chocolate, rotating it to ensure even coverage. Allow any excess chocolate to drip back into the bowl; you can gently tap the strawberry against the side of the bowl or give it a slight swirl to help this. Aim for a coating that is neither too thin (revealing too much strawberry) nor too thick (overwhelming the fruit). Once coated, place the dipped strawberry on a piece of parchment paper or a silicone baking mat. It’s essential to work quickly but deliberately. If you notice any streaks or unevenness, you can gently scrape the underside of the strawberry against the edge of the bowl before placing it down. The goal is a smooth, uniform layer of chocolate.
For those seeking a simpler approach without tempering, compound chocolate or candy melts are a viable option. These products are formulated to set firm at room temperature without the need for tempering. Simply melt them according to package directions, usually in the microwave in short intervals, stirring between each. The dipping process remains the same, but the resulting finish might be less glossy and have a slightly different mouthfeel compared to tempered couverture chocolate. However, for ease of use and consistent results, they are a popular choice, especially for larger batches or when time is a constraint.
Once dipped, the chocolate covered strawberries need to set. This can be achieved at room temperature, but it takes longer and can be affected by ambient temperature and humidity. For faster setting and a firmer finish, refrigerate the dipped strawberries. Place the parchment-lined baking sheet with the dipped strawberries into the refrigerator for about 15-30 minutes, or until the chocolate is completely firm. Avoid leaving them in the refrigerator for too long, as the moisture in the fridge can cause condensation to form on the chocolate, dulling its shine and potentially leading to blooming (white streaks or chalky appearance).
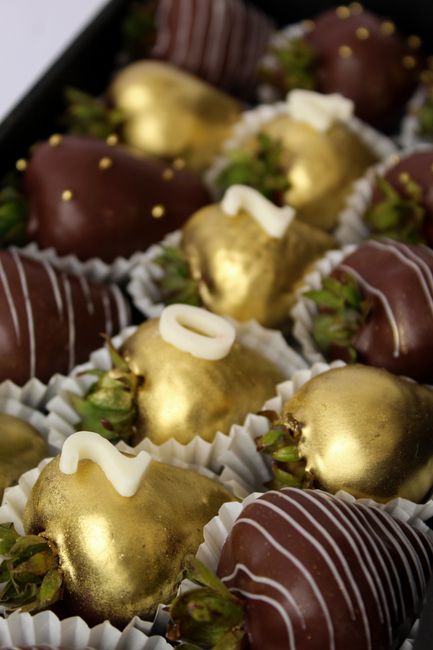
Decoration adds a personal touch and elevates the aesthetic appeal of chocolate covered strawberries. The possibilities are endless, but simplicity often reigns supreme. A drizzle of contrasting chocolate is a classic and effective technique. Melt a small amount of white chocolate (if using dark or milk chocolate for the base coating) or dark chocolate (if using white chocolate for the base) and place it in a piping bag fitted with a small round tip or a parchment paper cone. Pipe thin, even lines back and forth across the set chocolate-covered strawberries. For a more artisanal look, let the drizzle set slightly before piping a second layer in the opposite direction. Other simple yet impactful decorations include:
- Sprinkles: Opt for high-quality sprinkles that complement the chocolate and strawberry colors. Jimmies, nonpareils, or edible glitter can add sparkle and texture.
- Chopped Nuts: Toasted and finely chopped nuts like almonds, pistachios, or hazelnuts add crunch and a complementary flavor. Press them gently into the still-wet chocolate coating.
- Edible Flowers or Leaves: For a truly elegant touch, carefully place small edible flowers or mint leaves onto the wet chocolate.
- Cocoa Powder or Powdered Sugar: Lightly dusting with cocoa powder or powdered sugar after the chocolate has set can create a sophisticated, matte finish.
Troubleshooting common issues is an integral part of mastering chocolate covered strawberries. The most prevalent problem is seizing. This occurs when chocolate comes into contact with even a small amount of water. If your chocolate seizes, it will become thick, grainy, and unworkable. Unfortunately, seized chocolate cannot be salvaged for dipping. Prevention is key: ensure all utensils and bowls are completely dry, and be mindful of moisture when washing strawberries.
Another common issue is blooming. This refers to the white, chalky streaks that can appear on the surface of chocolate. It’s caused by either fat blooming (cocoa butter crystals separating and rising to the surface) or sugar blooming (sugar crystals dissolving and recrystallizing on the surface). Fat bloom is often a sign of improper tempering or temperature fluctuations. Sugar bloom is usually a result of exposure to moisture or high humidity. While bloomed chocolate is still safe to eat, it loses its visual appeal. Storing chocolate covered strawberries in an airtight container at a cool room temperature, away from direct sunlight and moisture, helps prevent blooming. Refrigeration, if done correctly, can also minimize bloom, but over-condensation can exacerbate it.
Achieving a smooth, glossy finish is often the ultimate goal. This is directly tied to the quality of the chocolate and proper tempering. Using couverture chocolate and meticulously following tempering guidelines will yield the best results. If the chocolate appears dull, it likely needs to be re-tempered or wasn’t tempered correctly in the first place.
Storing chocolate covered strawberries requires attention to their delicate nature. They are best enjoyed fresh, within 24-48 hours of making them. For short-term storage, place them in a single layer in an airtight container in a cool, dry place. Avoid stacking them, as this can cause them to stick together or mar their appearance. If refrigeration is necessary, do so in an airtight container to minimize moisture exposure. When bringing chilled strawberries to room temperature, allow them to sit at room temperature for about 20-30 minutes before serving to allow the chocolate to soften slightly and the flavors to meld.
Beyond the basic technique, consider variations and presentation. Chocolate covered strawberries can be filled with a variety of fillings for an added dimension of flavor and texture. A small dollop of ganache, a sliver of cream cheese, or even a tiny piece of cookie can be placed in the center of the strawberry before dipping. Presentation is also key. Arrange them artfully on a platter, in a decorative box, or tied with a ribbon for a thoughtful gift. For a more elaborate presentation, consider serving them alongside other complementary treats like macarons or gourmet cookies.
The versatility of chocolate covered strawberries extends to dietary considerations. For those seeking dairy-free options, use dairy-free dark chocolate or white chocolate alternatives. Many brands now offer high-quality vegan chocolates. Ensure your sprinkles and other decorations are also vegan-friendly. For a sugar-free option, look for sugar-free chocolate chips or bars and explore natural sugar substitutes for any added drizzles.
In conclusion, creating simple yet exquisite chocolate covered strawberries is a rewarding culinary endeavor. By prioritizing quality ingredients, mastering gentle melting and tempering techniques, and paying attention to detail during the dipping and setting processes, anyone can produce visually stunning and incredibly delicious treats. Understanding potential pitfalls and knowing how to avoid or address them will build confidence and lead to consistently impressive results. From the initial selection of plump, ripe berries to the final decorative flourish, each step contributes to the overall success of this timeless indulgence.
