
Iron Skillet Apple Pie
The Ultimate Cast Iron Skillet Apple Pie: A Rustic Delight
The cast iron skillet apple pie is not merely a dessert; it is a culinary heirloom, a testament to rustic simplicity and robust flavor. Its appeal lies in the unparalleled crust achieved in the forgiving heat of cast iron, a crust that achieves a unique crispness and depth of flavor often lost in conventional baking. This method transforms a classic into something extraordinary, delivering a deeply satisfying, home-style pie that’s as visually appealing as it is delicious. The inherent heat retention of cast iron ensures even cooking and caramelization of the apples, while its durability makes it a lifetime investment for any kitchen.
Understanding the Cast Iron Advantage for Pie Crust
The magic of a cast iron skillet apple pie begins with the crust. Unlike a standard pie plate, a cast iron skillet provides a more direct and consistent heat source from the bottom and sides. This intense, even heat promotes rapid browning and a superior crispness that’s difficult to replicate. The metal absorbs and radiates heat efficiently, cooking the bottom crust thoroughly and preventing the dreaded soggy bottom syndrome. This is crucial for apple pie, where the moisture from the fruit can easily compromise the crust’s texture. Furthermore, the cast iron surface, when properly seasoned, offers a naturally non-stick quality, making pie removal a breeze and cleanup remarkably simple. The slight imperfections in a well-loved skillet contribute to the pie’s rustic charm, with beautiful, slightly irregular edges that speak of homemade tradition.
Selecting the Perfect Apples for Your Skillet Pie
The foundation of any great apple pie is, of course, the apples. For a cast iron skillet version, the choice of apple variety significantly impacts the final texture and flavor profile. A blend of apples is often recommended to achieve a complex taste. Consider combining tart varieties with sweeter ones. Granny Smith apples are a classic for their tartness and firm texture, holding their shape well during baking. Honeycrisp apples offer a delightful crispness and a balanced sweet-tart flavor. Fuji and Gala apples contribute sweetness and a softer texture, which can help thicken the filling. Avoid overly soft apples like Red Delicious, as they tend to turn mushy and can release too much liquid, potentially leading to a watery filling and a less-than-ideal crust. Aim for apples that are firm and slightly tart, offering a good balance of sweetness and acidity to cut through the richness of the crust and filling.
Preparing the Apple Filling: The Heart of the Pie
The apple filling is where flavor truly shines. For a cast iron skillet apple pie, the preparation needs to be mindful of moisture content and caramelization. Begin by peeling, coring, and slicing your chosen apples. Aim for slices that are approximately ¼ to ½ inch thick. Too thin, and they’ll become mushy; too thick, and they may not cook through evenly. In a large bowl, toss the apple slices with your chosen sweeteners. Granulated sugar and brown sugar are common choices, with brown sugar adding a lovely caramel note. For spice, cinnamon is indispensable, but consider adding a pinch of nutmeg, allspice, or even a touch of ground ginger for added complexity. A squeeze of lemon juice not only brightens the apple flavor but also helps prevent browning. To thicken the filling and absorb excess moisture, all-purpose flour or cornstarch is typically used. A tablespoon or two will suffice, depending on the juiciness of your apples. Some bakers advocate for a brief maceration period, allowing the apples to sit with the sugar and spices for 15-30 minutes. This process draws out some of the natural juices, which can then be reserved and even slightly reduced on the stovetop before being returned to the apples, concentrating their flavor and creating a richer syrup.
Crafting the Perfect Pie Crust for Cast Iron
A stellar pie crust is paramount for a cast iron skillet apple pie. The key is to work with cold ingredients to create flaky layers. Combine all-purpose flour with salt in a bowl. Then, cut in very cold, unsalted butter or a combination of butter and shortening until the mixture resembles coarse crumbs with some pea-sized pieces of fat remaining. These fat pockets are essential for flakiness. Gradually add ice water, a tablespoon at a time, mixing until the dough just comes together. Be careful not to overwork the dough, as this will develop gluten and result in a tough crust. Divide the dough into two discs, wrap them in plastic wrap, and refrigerate for at least 30 minutes. This chilling period allows the gluten to relax and the fat to firm up, making the dough easier to roll and contributing to a flakier texture. When it’s time to assemble, take one disc and roll it out slightly larger than your cast iron skillet. Carefully drape it into the skillet, gently pressing it into the bottom and up the sides. Trim any excess dough, leaving a small overhang.
Assembling and Baking Your Cast Iron Masterpiece
Preheat your oven to a relatively high temperature, typically around 400-425°F (200-220°C). This initial heat is crucial for setting the bottom crust and initiating the caramelization of the apples. Pour the prepared apple filling into the dough-lined skillet, mounding it slightly in the center. Dot the top of the filling with small pieces of butter; this adds richness and aids in caramelization. Roll out the second disc of dough and either place it over the filling as a full top crust or cut it into strips for a lattice top. If creating a full top crust, cut vents in the dough to allow steam to escape. Crimp the edges of the top and bottom crusts together to seal. For added visual appeal and a richer color, brush the top crust with an egg wash (one egg beaten with a tablespoon of water or milk) and sprinkle with a little coarse sugar. Place the assembled pie on a baking sheet to catch any drips.
The Cast Iron Baking Process: Achieving Golden Perfection
The baking process for a cast iron skillet apple pie requires attention. Initially, bake at the higher temperature for about 15-20 minutes. This rapid burst of heat helps to set the crust and begin the cooking process. Then, reduce the oven temperature to around 375°F (190°C) and continue baking for another 35-45 minutes, or until the crust is deeply golden brown and the apple filling is bubbling thickly. If the crust edges begin to brown too quickly, you can loosely tent the pie with aluminum foil. The beauty of cast iron is its consistent heat distribution, which leads to an evenly cooked pie. The bubbling filling is a good indicator that the apples are tender and the juices have thickened. Once baked, carefully remove the skillet from the oven. It will be extremely hot, so use sturdy oven mitts.
Cooling and Serving: The Crucial Rest
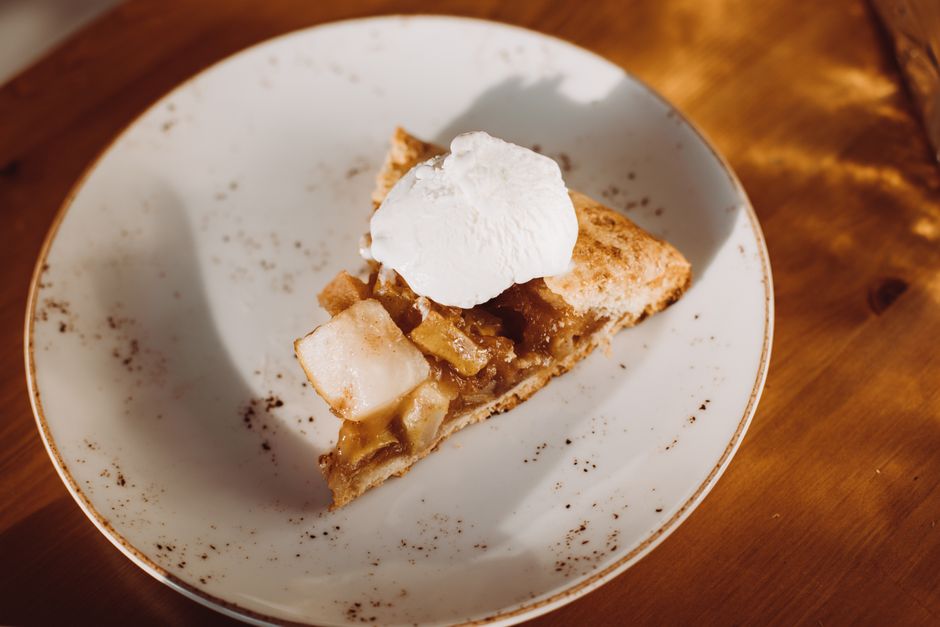
Patience is a virtue when it comes to pie, especially a cast iron skillet apple pie. It’s essential to allow the pie to cool significantly before slicing. This allows the filling to set properly, preventing a runny mess. Ideally, let the pie cool on a wire rack for at least 2-3 hours. The cast iron skillet will retain heat for a considerable time, so the cooling process may take longer than with a standard pie plate. The reward for this patience is a pie with perfectly set slices that showcase the beautiful layers of crisp crust and tender, caramelized apples. Serve warm or at room temperature. A scoop of vanilla ice cream or a dollop of freshly whipped cream is a classic accompaniment, but this pie stands magnificently on its own.
Tips for a Perfect Cast Iron Skillet Apple Pie
To ensure success with your cast iron skillet apple pie, consider these additional tips:
- Seasoning is Key: A well-seasoned cast iron skillet is crucial for preventing sticking and enhancing flavor. If your skillet is new or hasn’t been used recently, ensure it’s properly seasoned.
- Preheat the Skillet (Optional but Recommended): For an even crispier bottom crust, some bakers preheat their empty cast iron skillet in the oven for 10-15 minutes before adding the dough. Be extremely cautious when handling a preheated skillet.
- Dough Hydration: The amount of water needed for your pie dough can vary depending on humidity and the type of flour used. Add water gradually until the dough just forms.
- Apple Moisture Management: If your apples are particularly juicy, you can drain off some of the accumulated liquid after macerating, or even gently simmer the reserved liquid on the stovetop to reduce and thicken it before returning it to the apples.
- Preventing a Burnt Bottom Crust: If you find your bottom crust is browning too quickly, place a baking sheet on the rack below the pie. This acts as a heat shield.
- Lattice Top Technique: For a lattice top, cut even strips of dough. Weave them over the filling, alternating directions, and press the ends onto the bottom crust to seal.
- Blind Baking (Optional): For those who are extremely concerned about a soggy bottom, you could consider blind baking the bottom crust for about 10-15 minutes before adding the filling, but this is often unnecessary with the direct heat of cast iron.
The Enduring Appeal of the Cast Iron Skillet Apple Pie
The cast iron skillet apple pie is more than just a recipe; it’s an experience. It’s the aroma that fills your home, the satisfying crackle of the crust, and the comforting, familiar taste of perfectly cooked apples. This rustic dessert is a celebration of simple ingredients prepared with care, elevated by the unique cooking properties of cast iron. It’s a pie that brings people together, a centerpiece for any gathering, and a testament to the enduring power of home-baked goodness. Its SEO-friendly appeal lies in its classic nature, its visual appeal, and the specific, searchable benefits it offers (e.g., "crispy crust," "no soggy bottom," "easy cleanup"). Mastering this pie is a rewarding culinary achievement, yielding a dessert that is both deeply traditional and undeniably impressive. The cast iron skillet itself becomes an integral part of the pie’s story, a reliable tool that has likely seen generations of baking and will continue to do so. The inherent robustness of the skillet translates to a robust and richly flavored pie, making it a standout in the world of apple desserts. This article aims to provide a comprehensive guide to achieving that perfect pie, from selecting the right apples to the final, satisfying slice.
