
Instant Pot Baby Back Ribs
Instant Pot Baby Back Ribs: The Ultimate Guide to Fall-Off-The-Bone Perfection
Achieving restaurant-quality, fall-off-the-bone baby back ribs at home can often feel like a culinary Everest. Traditional methods, involving hours of slow smoking or oven braising, demand significant time commitment and often precise temperature control. However, the advent of the Instant Pot has revolutionized home cooking, offering a remarkably efficient and consistently successful pathway to tender, flavorful ribs. This comprehensive guide delves deep into the science and art of crafting perfect Instant Pot baby back ribs, providing detailed instructions, troubleshooting tips, and variations to suit every palate.
The magic of the Instant Pot for ribs lies in its ability to create a high-pressure environment. This intense steam pressure effectively breaks down the connective tissues within the pork, rendering the meat incredibly tender and succulent in a fraction of the time required by conventional methods. Unlike simmering on the stovetop, where much of the moisture can evaporate, the sealed nature of the Instant Pot locks in steam, ensuring the ribs remain moist throughout the cooking process. This is crucial for baby back ribs, which can easily become dry if overcooked. The pressure cooking phase is the foundation, creating the initial tenderness that allows for subsequent glazing and finishing to perfection.
Selecting the right baby back ribs is the first critical step toward success. Look for racks that are uniformly thick, with a good balance of meat and fat. Avoid ribs that appear overly lean, as the fat contributes significantly to flavor and moisture. The membrane on the bone side of the ribs is a tough, leathery layer that can impede the absorption of marinades and rub, and can also be unpleasant in texture. It is essential to remove this membrane. To do this, slide a thin, blunt knife (like a butter knife) under the membrane at one end of the rack. Gently lift the membrane, then grip it with a paper towel (this provides better traction) and pull it away from the bones. This simple step dramatically improves the final texture and flavor of your ribs.
The seasoning of the ribs is paramount to developing their characteristic flavor profile. While simple salt and pepper can suffice, a well-constructed rub elevates them to a new level. A classic BBQ rub typically includes a base of brown sugar for sweetness and caramelization, paprika for color and a mild smoky flavor, garlic powder and onion powder for savory depth, and a touch of cayenne pepper or chili powder for a subtle kick. Other popular additions include cumin for earthy notes, celery seed for a hint of bitterness, and dried mustard for a tangy warmth. Experimentation is key here; consider incorporating ingredients like smoked paprika for a more pronounced smoky flavor, or even a pinch of ground coffee for an unexpected depth. The rub should be applied generously to all sides of the ribs, massaging it into the meat to ensure maximum coverage and penetration. Allowing the ribs to sit with the rub for at least 30 minutes, or ideally several hours (or even overnight) in the refrigerator, allows the flavors to meld and penetrate the meat further.
When it comes to the liquid for pressure cooking, balance is crucial. Too much liquid can lead to watery ribs and dilute the flavor. Too little can result in the dreaded "burn notice" on the Instant Pot. A common and effective ratio is approximately 1 cup of liquid per rack of ribs. This liquid serves multiple purposes: it generates the steam necessary for pressure cooking and can also contribute to the overall flavor. Options for the liquid include water, chicken broth, beef broth, apple cider vinegar, or even a combination. Apple cider vinegar is particularly effective as its acidity helps to tenderize the meat. Some recipes also suggest adding a splash of Worcestershire sauce or a bit of soy sauce to the liquid for an umami boost. Ensure the liquid is spread evenly across the bottom of the Instant Pot insert to prevent scorching.
Positioning the ribs within the Instant Pot is another important consideration. Ribs are often too large to fit flat in a single layer. The most effective method is to stand them upright, bone-side down, against the inner wall of the pot. This allows for even exposure to the steam. If you have multiple racks, you may need to arrange them in a circular fashion, leaning against each other. Some Instant Pot models come with a trivet, which can be useful for lifting the ribs slightly above the liquid, though it’s not strictly necessary for this recipe. Ensure the ribs are not crammed too tightly, as this can impede the circulation of steam.
The cooking time in the Instant Pot is surprisingly short. For baby back ribs, a typical pressure cooking time ranges from 25 to 35 minutes on high pressure. The exact time will depend on the thickness of your ribs and your desired level of tenderness. It’s always better to err on the side of slightly undercooking during the initial pressure phase, as you can always add more time if needed. A natural pressure release (NPR) is generally recommended for ribs. This means allowing the pressure to dissipate naturally after the cooking cycle is complete. NPR typically takes around 10-15 minutes. This slow release of pressure allows the meat to reabsorb some of its juices, resulting in a more tender and moist final product. A quick pressure release (QPR) can cause the moisture to be expelled rapidly, leading to drier ribs.
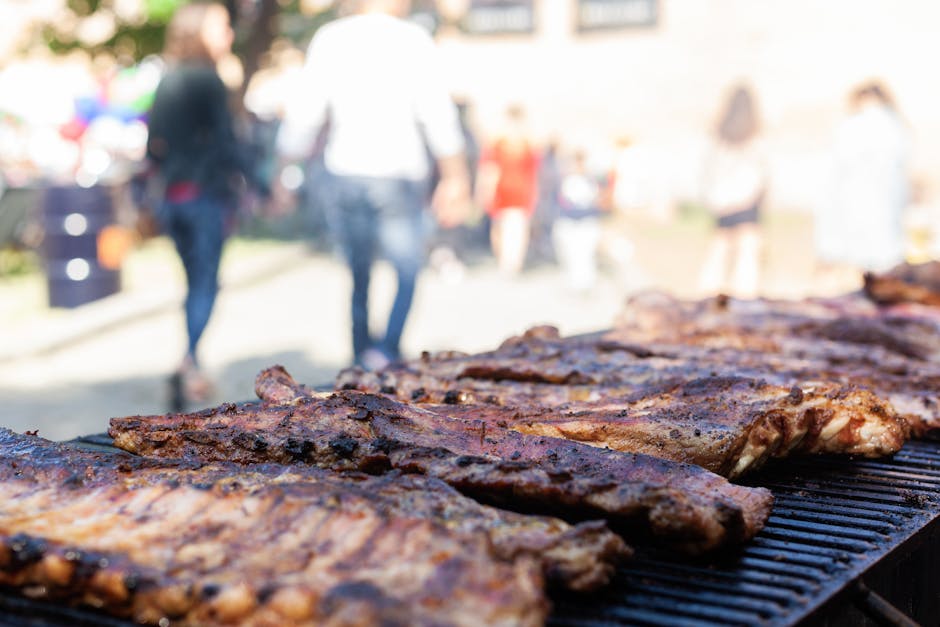
Following the pressure cooking, the ribs will be tender but likely won’t have the characteristic sticky, caramelized exterior of well-finished BBQ ribs. This is where the finishing step comes in, and it is absolutely essential for achieving that desirable glaze. Many home cooks opt to finish their Instant Pot ribs under the broiler or on a grill.
Broiler Finish: Preheat your broiler to high. Line a baking sheet with foil or parchment paper (for easy cleanup). Arrange the cooked ribs on the prepared baking sheet, meat-side up. Brush them generously with your favorite BBQ sauce. Be sure to coat every surface. Place the baking sheet under the broiler, keeping a very close eye on the ribs. Broiling is a rapid process, and the sugars in the BBQ sauce can burn quickly. Rotate the pan as needed to ensure even browning and caramelization. This usually takes only 2-5 minutes per side, depending on your broiler’s intensity. The goal is a sticky, slightly charred glaze.
Grill Finish: If you prefer a smoky char and authentic BBQ flavor, finishing on the grill is an excellent option. Preheat your grill to medium-high heat. Clean and oil the grill grates to prevent sticking. Place the cooked ribs on the grill, meat-side down, and brush with BBQ sauce. Grill for 2-3 minutes per side, basting with more sauce as needed, until the sauce is caramelized and slightly charred. Watch carefully to avoid burning.
Oven Finish (alternative): For a more hands-off approach, you can finish the ribs in a preheated oven at 400°F (200°C). Place the sauced ribs on a foil-lined baking sheet and bake for 10-15 minutes, or until the sauce is bubbly and slightly caramelized.
Troubleshooting common issues is vital for consistent success. The dreaded "burn notice" can occur if there isn’t enough liquid in the pot or if the bottom of the pot has been scorched by the rub. Ensure you use at least 1 cup of liquid and scrape the bottom of the insert to remove any stuck-on bits before adding the ribs. If your ribs are still not tender enough after the initial cooking time, you can add more time in 5-minute increments, followed by a brief natural release. Conversely, if they are too soft and falling apart excessively, it might mean they were overcooked in the pressure phase, though they will still be delicious.
Variations on this basic recipe are endless. Consider adding a smoky element during the pressure cooking phase by incorporating a tablespoon of liquid smoke into the cooking liquid. For a spicier kick, add a pinch of red pepper flakes or a finely chopped jalapeño to the liquid. Different BBQ sauces can dramatically alter the final flavor profile. A sweet and tangy Kansas City-style sauce offers a classic profile, while a vinegar-based Carolina sauce provides a more piquant experience. For an Asian-inspired twist, consider a hoisin-based glaze with ginger and garlic.
Storage of cooked ribs is straightforward. Once cooled, they can be wrapped tightly in foil or stored in an airtight container in the refrigerator for up to 3-4 days. Reheating can be done in the oven, on the grill, or even briefly in the microwave, though be mindful of overcooking. The Instant Pot can also be used for reheating, though care must be taken to avoid drying them out.
The Instant Pot baby back ribs recipe is a game-changer for busy home cooks and BBQ enthusiasts alike. It delivers incredibly tender, flavorful ribs with minimal effort and time commitment, rivaling even the most dedicated pitmaster’s results. The principles of pressure cooking, proper seasoning, and a well-executed finishing step are the cornerstones of this delicious culinary achievement. Embrace the simplicity and speed of the Instant Pot and enjoy perfectly cooked baby back ribs anytime the craving strikes. Remember that consistency comes with practice, and each batch will allow you to refine your technique and tailor the flavors to your exact preferences. The journey to fall-off-the-bone perfection is now more accessible than ever.
