
Host Https Www Allrecipes Com Recipe 10884 Babe Ruth Bars
Babe Ruth Bars Recipe: A Nostalgic Journey to a Classic Treat
The Babe Ruth Bar, a confection that evokes a potent wave of nostalgia for many, is far more than just a candy bar. It’s a textural symphony, a flavor explosion, and a testament to simple yet profoundly satisfying ingredients. While commercially produced Babe Ruth bars have graced candy aisles for decades, the allure of crafting this iconic treat at home is undeniable. This article delves deep into the heart of the Babe Ruth Bar, offering a comprehensive guide to recreating this beloved classic, exploring its origins, the science behind its unique texture, ingredient considerations, and an accessible, step-by-step recipe. We will unpack the magic that makes these bars so enduringly popular, ensuring you can confidently bring this taste of childhood back into your kitchen. The goal is to provide readers with not just a recipe, but an understanding of what makes a Babe Ruth Bar truly special, empowering them to achieve authentic results.
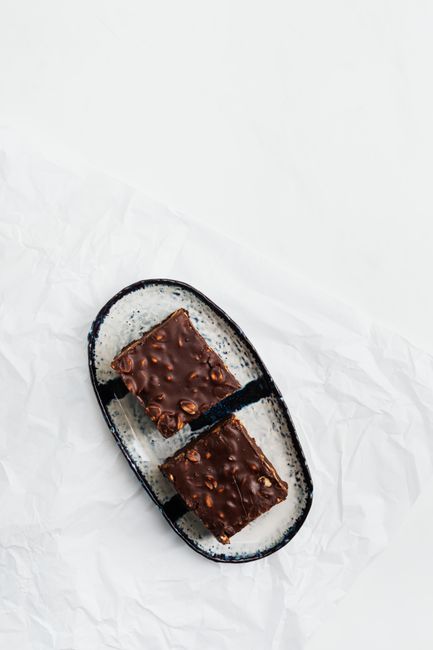
At its core, a Babe Ruth Bar is a delightful juxtaposition of chewy nougat, crisp rice cereal, and a generous coating of rich milk chocolate. The magic lies in how these seemingly disparate elements come together to create a harmonious and unforgettable eating experience. The nougat provides a soft, yielding base, offering a subtle sweetness and a satisfying chew. Interspersed within this nougat are the crisp rice cereal, which introduces a crucial textural contrast, providing a delightful crunch that cuts through the chewiness. Finally, the entire creation is enrobed in a smooth, creamy milk chocolate, which binds everything together and adds a layer of decadent richness. This interplay of textures – chewy, crunchy, and smooth – is what truly defines the Babe Ruth Bar and sets it apart from many other candy bars. Understanding this fundamental balance is key to successful home recreation.
The origin story of the Babe Ruth Bar is intrinsically linked to the burgeoning popularity of candy bars in the early 20th century. While definitive proof remains elusive, the bar is widely believed to have been created by the Schulze Baking Company in Milwaukee, Wisconsin, in 1920. Named in honor of the legendary baseball player George Herman "Babe" Ruth, whose star was rapidly ascending at the time, the bar was marketed as a substantial and energy-boosting treat, fitting for an athlete of his caliber. The timing of its introduction coincided with a boom in confectionery innovation, where manufacturers were experimenting with new flavor combinations and textures to capture the public’s imagination. The Babe Ruth Bar quickly found its footing, its unique composition resonating with consumers seeking a more complex and satisfying candy experience than simpler chocolate bars. Its enduring popularity speaks to the timeless appeal of its innovative design.
Delving into the technical aspects of a successful Babe Ruth Bar reveals a few key considerations that impact both flavor and texture. The nougat, for instance, is not merely a sweet paste but a carefully balanced emulsion. The cooking temperature of the sugar syrup is critical; too low, and the nougat will be sticky and overly sweet; too high, and it will be hard and brittle. The incorporation of egg whites plays a crucial role in creating the light, airy, and chewy texture characteristic of a good nougat. They provide structure and volume when whipped, contributing to the overall mouthfeel. The ratio of sugar, corn syrup, and egg whites is a delicate dance, and achieving the correct consistency before incorporating the other ingredients is paramount. Furthermore, the type of fat used in the nougat, typically butter, contributes to its richness and smooth mouthfeel.
The inclusion of crisp rice cereal is not arbitrary; it’s a deliberate textural element. The goal is to maintain the cereal’s crispness within the chewy nougat. This is achieved by ensuring the nougat mixture isn’t excessively moist and by incorporating the cereal just before the mixture begins to set. The cereal’s airy structure also contributes to the overall lightness of the bar, preventing it from becoming too dense. Think of the cereal as tiny pockets of crunch, providing an exciting counterpoint to the yielding nougat. The quality and freshness of the crisp rice cereal are also important; stale cereal will lead to a disappointing lack of crunch.
The chocolate coating is the final, unifying element of the Babe Ruth Bar. Milk chocolate is the traditional choice, offering a familiar sweetness and creaminess that complements the nougat and cereal perfectly. The tempering of the chocolate is a vital step for achieving a professional finish. Untempered chocolate will result in a dull, crumbly coating that may bloom (develop white streaks). Properly tempered chocolate, however, will have a glossy sheen, a satisfying snap, and melt smoothly in the mouth. Understanding the basic principles of chocolate tempering – controlled heating and cooling to stabilize the cocoa butter crystals – is crucial for a truly exceptional Babe Ruth Bar. The fat content and quality of the milk chocolate will also significantly impact the final flavor.
Now, let’s embark on the culinary adventure of creating your own Babe Ruth Bars. This recipe aims for authenticity and aims to replicate the texture and flavor that has made this bar a classic.
Authentic Babe Ruth Bar Recipe
Yields: Approximately 12-16 bars
Prep time: 30 minutes
Cook time: 25-30 minutes
Cooling time: At least 2 hours
Ingredients:
-
For the Nougat:
- 1 cup granulated sugar
- 1/2 cup light corn syrup
- 1/4 cup water
- 2 large egg whites, at room temperature
- 1 teaspoon vanilla extract
- 1/4 teaspoon salt
- 1/2 cup salted butter, cut into cubes
-
For the Filling:
- 1 cup creamy peanut butter (use a standard commercial brand for authentic flavor and texture)
- 2 cups crisp rice cereal
-
For the Chocolate Coating:
- 2 cups milk chocolate chips or finely chopped milk chocolate
- 2 tablespoons vegetable oil or coconut oil (optional, for thinning)
Equipment:
- Medium saucepan
- Candy thermometer
- Large mixing bowl
- Electric mixer (stand mixer or hand mixer)
- Spatula
- 9×13 inch baking pan, lined with parchment paper and lightly greased (or sprayed with non-stick cooking spray)
- Double boiler or microwave-safe bowl for melting chocolate
- Baking sheet lined with parchment paper (for dipped bars)
Instructions:
Step 1: Prepare the Pan
Line your 9×13 inch baking pan with parchment paper, ensuring there is an overhang on the sides for easy removal. Lightly grease the parchment paper or spray it with non-stick cooking spray. Set aside.
Step 2: Make the Sugar Syrup
In a medium saucepan, combine the granulated sugar, light corn syrup, and water. Stir to combine. Place the saucepan over medium heat and bring the mixture to a boil without stirring. Clip a candy thermometer to the side of the pan, ensuring the bulb is submerged in the syrup but not touching the bottom. Cook the syrup until it reaches 240°F (115°C) on the candy thermometer (soft-ball stage). This will take approximately 8-10 minutes.
Step 3: Whip the Egg Whites
While the sugar syrup is cooking, in a large mixing bowl, combine the room temperature egg whites, vanilla extract, and salt. Beat the egg whites with an electric mixer on medium-high speed until stiff peaks form. Stiff peaks mean that when you lift the beaters, the egg whites stand straight up without curling over.
Step 4: Combine Syrup and Egg Whites
Once the sugar syrup reaches 240°F (115°C), carefully and slowly drizzle the hot syrup in a thin, steady stream into the whipped egg whites while the mixer is running on medium-high speed. Be very careful, as the hot syrup can cause splattering. Continue mixing until all the syrup has been added.
Step 5: Add Butter and Mix
Reduce the mixer speed to low and add the cubed butter to the nougat mixture. Mix until the butter is fully incorporated and melted, creating a smooth, glossy, and slightly sticky nougat. This process might take a few minutes. The mixture will start to thicken as it cools.
Step 6: Incorporate Peanut Butter and Cereal
Once the nougat has cooled slightly and is manageable to handle (it will still be warm), add the creamy peanut butter. Mix on low speed until the peanut butter is fully incorporated and the mixture is a uniform color. This may require some scraping down of the bowl. Next, gently fold in the crisp rice cereal with a spatula until it is evenly distributed throughout the nougat. Be careful not to crush the cereal too much.
Step 7: Press into Pan
Working quickly while the mixture is still pliable, pour the nougat mixture into the prepared baking pan. Use a lightly greased spatula or your hands (lightly greased to prevent sticking) to press the mixture evenly into the pan, filling it to a uniform thickness of about 3/4 inch. Ensure the edges are neat.
Step 8: Cool and Cut
Allow the mixture to cool at room temperature for at least 30 minutes, then cover the pan with plastic wrap and refrigerate for at least 2 hours, or until firm and easy to handle. Once firm, use the parchment paper overhang to lift the entire slab out of the pan. Place it on a cutting board and cut it into desired bar shapes. Aim for bars that are roughly the size of a traditional candy bar.
Step 9: Melt the Chocolate
While the nougat is cooling, prepare your chocolate coating. You can melt the chocolate chips or chopped chocolate using a double boiler or in the microwave.
- Double Boiler Method: Fill the bottom pot of a double boiler with about an inch of water and bring it to a simmer. Place the chocolate in the top pot, ensuring the bottom of the pot does not touch the water. Stir frequently until the chocolate is smooth and melted.
- Microwave Method: Place the chocolate in a microwave-safe bowl. Microwave on 50% power for 30-second intervals, stirring well after each interval, until the chocolate is smooth and melted. Be careful not to overheat.
If using, stir in the vegetable oil or coconut oil to thin the chocolate for easier dipping.
Step 10: Coat the Bars
This is where you can choose your coating method: fully enrobed or drizzled. For a fully enrobed bar, dip each nougat bar into the melted chocolate, ensuring it is completely covered. Use a fork or dipping tool to lift the bar, allowing excess chocolate to drip back into the bowl. Place the dipped bar on a parchment-lined baking sheet to set. For a drizzled effect, you can use a spoon to drizzle melted chocolate over the nougat bars once they have been cut.
Step 11: Let Chocolate Set
Allow the chocolate-coated bars to set completely at room temperature, or speed up the process by refrigerating them for about 15-20 minutes. Once the chocolate is firm, your Babe Ruth Bars are ready to enjoy.
Tips for Success and Variations:
- Peanut Butter Choice: While creamy peanut butter is traditional, some recipes experiment with crunchy peanut butter for added texture. However, be mindful that this can alter the overall smoothness.
- Cereal Crispness: Ensure your crisp rice cereal is fresh. If it feels a bit soft, you can toast it lightly in a dry pan over low heat for a few minutes to re-crisp it.
- Chocolate Quality: The quality of your milk chocolate will significantly impact the final flavor. Opt for good quality chocolate chips or bars for the best results.
- Tempering Chocolate: For a more professional finish and a chocolate that snaps cleanly, consider learning to temper your chocolate. This involves precise temperature control during melting and cooling.
- Nut Additions: While not traditional, some enjoy adding chopped peanuts to the nougat mixture for an extra nutty crunch.
- Storage: Store Babe Ruth Bars in an airtight container at room temperature for up to a week, or in the refrigerator for longer storage. They can also be frozen.
- Allergies: Be mindful of peanut allergies. If you need to make a nut-free version, you would need to find suitable substitutes for both the peanut butter and the nuts that might be added.
Recreating Babe Ruth Bars at home is a rewarding experience that allows you to connect with a piece of culinary history. The process, while requiring attention to detail, is ultimately straightforward and yields a delicious, nostalgic treat. By understanding the interplay of ingredients and techniques, you can consistently produce authentic-tasting Babe Ruth Bars that will delight yourself and anyone fortunate enough to share them with you. This classic candy bar, born from a desire to create something substantial and satisfying, continues to hold a special place in the hearts and palates of many, proving that sometimes, the simplest combinations are the most enduring. The appeal of a homemade Babe Ruth Bar lies not just in its taste and texture, but in the joy of creation and the connection to cherished memories.
