
Simple Chocolate Covered Strawberries 2
Simple Chocolate Covered Strawberries: A Deliciously Easy Treat
Chocolate-covered strawberries represent a timeless classic, a seemingly simple indulgence that evokes feelings of romance, celebration, and pure, unadulterated joy. While they appear elegant and sophisticated, the reality is that creating these delightful treats at home is surprisingly straightforward, requiring minimal ingredients and a short amount of time. This comprehensive guide delves into the art of crafting perfect simple chocolate-covered strawberries, offering detailed instructions, essential tips, and creative variations to elevate this beloved dessert. Whether you’re a novice baker or an experienced cook looking for a quick and impressive recipe, understanding the fundamental techniques will ensure consistently delicious results. The beauty of chocolate-covered strawberries lies in their inherent simplicity. At their core, they are merely fresh, ripe strawberries enrobed in melted chocolate. However, achieving that perfect glossy finish and even coating requires attention to detail and a few key considerations. This article will break down each step, demystifying the process and empowering you to create stunning chocolate-covered strawberries that rival those found in high-end patisseries.
The foundation of any successful chocolate-covered strawberry recipe is the quality of the ingredients. For this simple iteration, two primary components are paramount: fresh strawberries and high-quality chocolate. Selecting ripe, firm strawberries is crucial. Look for berries that are plump, vibrantly red, and free from bruising or soft spots. The natural sweetness and texture of the strawberry play a vital role in the overall flavor profile. Washing the strawberries gently under cool running water and then thoroughly drying them is a non-negotiable step. Any residual moisture will prevent the chocolate from adhering properly, leading to a patchy or uneven coating. Patting them dry with paper towels or a clean kitchen towel is essential. Leaving the stems on adds an attractive visual element and provides a convenient handle for dipping, making the process less messy and more enjoyable. For the chocolate, opting for good quality couverture chocolate is highly recommended. Couverture chocolate contains a higher percentage of cocoa butter, which melts more smoothly and creates a superior shine and snap compared to standard chocolate chips. While chocolate chips can be used in a pinch, they often contain stabilizers that can make them more difficult to melt and achieve a glossy finish. Dark, milk, or white chocolate are all viable options, and the choice often comes down to personal preference. Consider melting different types of chocolate to create a visually appealing assortment. For a richer flavor, consider using chocolate with a higher cocoa content.
The melting process for the chocolate is a critical step that requires careful attention to temperature control. Overheating chocolate can cause it to seize, becoming a thick, unmanageable paste. The most common and effective method for melting chocolate for dipping is the double boiler technique. This involves placing the chocolate in a heatproof bowl set over a saucepan of simmering water. It is imperative that the bottom of the bowl does not touch the water, as direct heat will scorch the chocolate. Stir the chocolate gently and continuously with a silicone spatula or wooden spoon as it melts. The residual heat from the steam will gradually melt the chocolate into a smooth, flowing consistency. Alternatively, microwaving the chocolate in short, 20-30 second intervals, stirring thoroughly between each interval, can also be effective. Again, vigilance is key to prevent overheating. The chocolate should be melted until it is smooth and completely free of lumps. Once melted, remove the bowl from the heat. If you are using a higher percentage cocoa chocolate, you might find it beneficial to add a small amount of neutral oil, such as vegetable oil or canola oil, to thin it slightly and improve its flow. A teaspoon or two is usually sufficient. This will create a more fluid consistency, making dipping the strawberries easier and resulting in a thinner, more elegant coating.
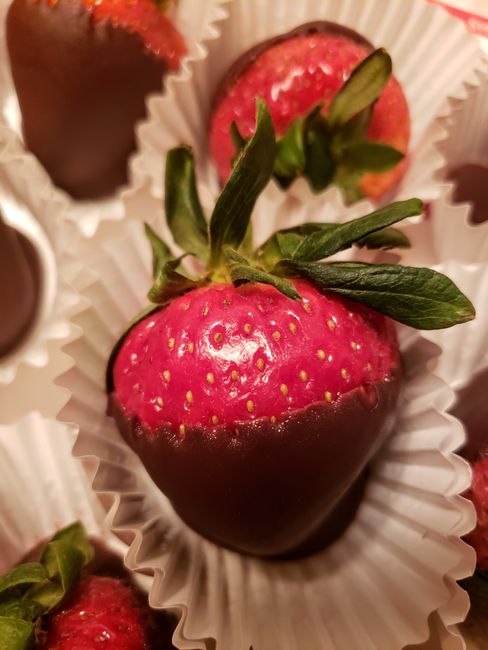
Once the chocolate is melted and smooth, the dipping process begins. Holding a strawberry by its stem, carefully immerse it into the melted chocolate, rotating it to ensure an even coating. Aim to dip the strawberry about two-thirds of the way up, leaving a small border of red visible near the stem. This not only looks attractive but also provides a good grip. Gently lift the strawberry out of the chocolate and allow any excess to drip back into the bowl. You can gently tap the wrist holding the strawberry against the rim of the bowl to help remove excess chocolate. Some prefer to use a skewer inserted into the strawberry for easier dipping, especially for a more extensive coating. This method requires careful insertion to avoid damaging the fruit. After dipping, place the chocolate-covered strawberries on a parchment paper-lined baking sheet or a silicone baking mat. This prevents them from sticking as the chocolate hardens. It is important to work relatively quickly, as the chocolate will begin to set as it cools. If the chocolate starts to thicken significantly, you can gently reheat it using the double boiler or microwave method.
For the most visually appealing and structurally sound chocolate-covered strawberries, allowing them to set properly is essential. Once dipped, place the baking sheet with the strawberries in the refrigerator for at least 15-20 minutes, or until the chocolate is completely firm and set. This chilling process helps the chocolate solidify, creating that satisfying snap when you bite into the strawberry. For a truly elegant presentation, consider a second dip. Once the first layer of chocolate has set, you can re-melt the chocolate and dip the strawberries again for a thicker, more uniform coating. This is particularly effective if the first dip was a bit uneven. Another option for a professional finish is to drizzle contrasting chocolate over the already dipped strawberries. Once the initial chocolate coating has set, melt a different color of chocolate (e.g., white chocolate over dark, or dark over milk) and place it in a piping bag fitted with a small round tip, or a Ziploc bag with a corner snipped off. Drizzle the melted chocolate back and forth over the strawberries in a decorative pattern. This adds an extra layer of visual appeal and flavor complexity.
Beyond the classic dark, milk, and white chocolate, there are numerous ways to personalize and elevate your simple chocolate-covered strawberries. For a touch of crunch and texture, consider rolling the still-wet chocolate-covered strawberries in toppings before they set. Popular choices include chopped nuts (almonds, walnuts, pistachios), shredded coconut, sprinkles, mini chocolate chips, or even crushed cookie crumbs. A sprinkle of sea salt on dark chocolate-covered strawberries can create a delightful sweet and salty contrast. For a more sophisticated flavor profile, infuse the melted chocolate with spices like cinnamon or chili powder, or add a drop of extract such as peppermint or orange. For a truly decadent experience, consider dipping the strawberries in melted caramel before enrobing them in chocolate. This adds a chewy texture and a rich, buttery flavor. Another advanced technique involves tempering the chocolate. Tempering chocolate is a process of controlled heating and cooling that aligns the cocoa butter crystals, resulting in a chocolate that is shiny, firm, and snaps cleanly when broken. While more involved, properly tempered chocolate offers the most professional finish and superior texture. However, for simple chocolate-covered strawberries, the double boiler or microwave method is perfectly adequate for achieving delicious results.
Storing your chocolate-covered strawberries is crucial to maintaining their freshness and appearance. It is best to consume them within 24-48 hours of making them for optimal quality. Store them in a single layer in an airtight container in the refrigerator. Avoid stacking them, as this can cause them to stick together or damage the chocolate coating. If storing for longer than a day, it’s advisable to place a layer of parchment paper between rows of strawberries to prevent sticking. It’s important to note that condensation can form on the chocolate when removed from the refrigerator if they are not allowed to come to room temperature gradually. For the best texture and flavor, allow them to sit at room temperature for about 15-20 minutes before serving. If you are making them for a special occasion well in advance, consider dipping them closer to the event. While freezing is an option, it can affect the texture of both the strawberry and the chocolate coating. If you do choose to freeze them, do so on a baking sheet until solid, then transfer to an airtight container. Thaw them slowly in the refrigerator before consuming.
The versatility of simple chocolate-covered strawberries makes them suitable for a wide range of occasions. They are a classic choice for Valentine’s Day, anniversaries, birthdays, or simply as a romantic gesture. Their elegant appearance also makes them a popular addition to dessert tables for parties, weddings, or corporate events. You can tailor the chocolate type and toppings to match specific themes or color schemes. For instance, using white chocolate and red sprinkles can create a festive Fourth of July dessert, while a combination of dark chocolate and slivered almonds can be a sophisticated choice for a holiday gathering. The simplicity of the recipe allows for a significant amount of creativity, making them a crowd-pleasing and adaptable treat. Understanding the core principles of selecting ingredients, melting chocolate correctly, and proper dipping techniques will unlock a world of delicious possibilities. The satisfaction of creating these beautiful and tasty treats from scratch is immense, and the delighted reactions of those who enjoy them are even more rewarding. The humble strawberry, when paired with the richness of chocolate, transforms into something truly magical, proving that sometimes, the simplest pleasures are indeed the most profound and delicious. This exploration of simple chocolate-covered strawberries has laid the groundwork for you to confidently embark on your own culinary adventure, creating a treat that is as enjoyable to make as it is to devour. Remember to experiment with different chocolate types and toppings to discover your personal favorites and to impress your guests with your homemade creations.