
Pan Seared Chicken Tenderloin
Pan Seared Chicken Tenderloin: A Culinary Masterclass in Flavor and Technique
Pan searing chicken tenderloin is a straightforward yet exceptionally rewarding cooking method, yielding a succulent, flavorful, and visually appealing dish. Chicken tenderloin, also known as chicken tenders or the inner fillet, is a naturally tender cut of meat derived from the pectoralis minor muscle. Its lean composition and elongated shape make it an ideal candidate for quick, high-heat cooking techniques like pan searing. This method locks in moisture, creates a beautiful golden-brown crust, and allows for a wide range of flavor profiles to be introduced through marinades, rubs, or pan sauces. Understanding the fundamental principles of pan searing, combined with specific considerations for chicken tenderloin, unlocks a world of culinary possibilities, from weeknight dinners to sophisticated appetizers.
The core principle of pan searing lies in the Maillard reaction, a complex chemical process that occurs when amino acids and reducing sugars in food are exposed to high heat. This reaction is responsible for the browning and the development of hundreds of distinct flavor compounds, contributing to the savory, complex, and highly desirable taste and aroma of seared foods. For chicken tenderloin, the relatively small size and thinness of the cut mean that this reaction happens quickly. The goal is to achieve a deep, even sear without overcooking the interior, which can lead to dryness. This requires careful temperature management of the cooking vessel and precise timing.
Selecting high-quality chicken tenderloin is the first step towards a successful pan-seared dish. Look for tenderloins that are pale pink in color, firm to the touch, and free from excessive moisture or bruising. The size of the tenderloins can vary, so it’s important to adjust cooking times accordingly. If the tenderloins are particularly thick, they may benefit from being gently pounded to a more uniform thickness before searing, ensuring even cooking. For optimal results, it’s advisable to remove any excess fat or connective tissue, although this is generally minimal with tenderloins. Patting the tenderloins thoroughly dry with paper towels is a crucial preparatory step. Moisture on the surface of the meat will steam rather than sear, hindering the development of that coveted crispy crust.
The choice of cooking fat is also critical. A high smoke point oil is essential to prevent the fat from burning and imparting an acrid flavor to the chicken. Common and effective choices include vegetable oil, canola oil, grapeseed oil, or avocado oil. For an added layer of flavor, clarified butter (ghee) or a combination of oil and butter can be used. Butter, when added towards the end of searing, contributes richness and aids in browning, but it has a lower smoke point, so it should be introduced when the searing is mostly complete or at a slightly reduced heat.
The cooking vessel itself plays a significant role. A heavy-bottomed skillet, such as cast iron or stainless steel, is ideal. These materials distribute heat evenly and retain it effectively, which is paramount for achieving a consistent sear across the entire surface of the tenderloin. Non-stick pans can be used, but they may not achieve the same level of browning as their heavier counterparts. Regardless of the pan material, preheating it thoroughly before adding the fat and chicken is non-negotiable. A properly preheated pan ensures immediate searing upon contact, preventing the chicken from sticking and promoting rapid crust formation.
The process of pan searing chicken tenderloin typically involves several key stages. Firstly, prepare the tenderloins by ensuring they are dry and seasoning them generously. Simple salt and freshly ground black pepper are the foundational seasonings, but this is where the culinary creativity can begin. Garlic powder, onion powder, paprika, or dried herbs like thyme and rosemary can be added to the salt and pepper blend for an initial flavor boost. For those seeking a more intense flavor, a marinade can be employed. Marinades, often containing acidic components like lemon juice or vinegar, and oils, can tenderize the chicken further and infuse it with vibrant tastes. However, it’s crucial to remember that acidic marinades can "cook" the surface of the chicken if left for too long, so a shorter marinating time (30 minutes to 2 hours) is generally recommended for tenderloins.
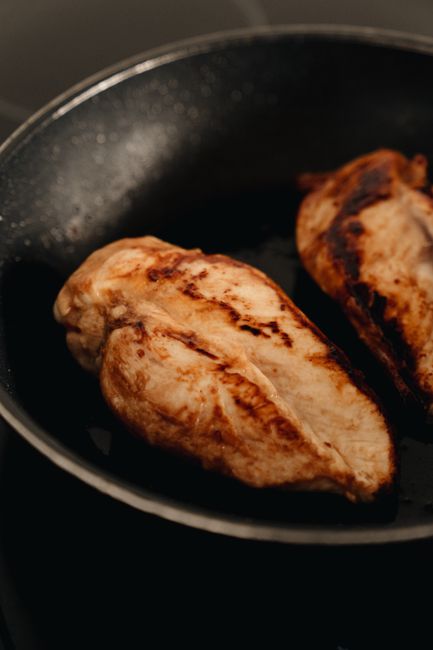
Once the tenderloins are seasoned, the preheated skillet should have a thin, even layer of cooking oil. The oil should shimmer, indicating it’s hot enough to sear. Carefully place the chicken tenderloins into the hot skillet, ensuring they are not overcrowded. Overcrowding the pan will lower the temperature of the oil, leading to steaming rather than searing. If necessary, cook the tenderloins in batches. Allow the chicken to sear undisturbed for several minutes per side, depending on their thickness. The initial sear should create a beautiful golden-brown crust. Resist the urge to move or flip the chicken too early; this will disrupt the formation of the crust.
After the initial sear, the heat can be slightly reduced if the browning is progressing too quickly or if the tenderloins are thick and require more time to cook through. For thicker tenderloins, a finishing step in the oven can ensure the interior is cooked to a safe temperature without burning the exterior. In this case, after searing both sides, transfer the skillet (if oven-safe) or the chicken to a preheated oven (around 375-400°F or 190-200°C) for a few minutes until the internal temperature reaches 165°F (74°C). For thinner tenderloins, they can often be cooked entirely on the stovetop, with careful monitoring of the internal temperature.
The internal temperature of chicken is a critical food safety concern. Chicken tenderloin, like all chicken, must reach an internal temperature of 165°F (74°C) to be considered safe for consumption. Using an instant-read thermometer is the most accurate way to determine doneness. Insert the thermometer into the thickest part of the tenderloin, avoiding bone or fat. The juices should run clear when pierced with a fork or knife. Overcooking is the primary culprit for dry chicken tenderloin, so vigilance with the thermometer is key.
Beyond the basic sear, the possibilities for enhancing pan-seared chicken tenderloin are extensive. Pan sauces are a natural and delicious accompaniment. Once the chicken is removed from the pan, the residual fond (browned bits stuck to the bottom of the pan) is the foundation for a flavorful sauce. Deglaze the pan with a liquid such as chicken broth, white wine, or even water. Scrape up the fond with a wooden spoon, allowing it to dissolve into the liquid. This process extracts concentrated flavor. Aromatics like minced garlic, shallots, or onions can be sautéed in the pan before deglazing, adding another layer of complexity. Cream, butter, herbs, or a squeeze of lemon juice can then be incorporated to create a rich and satisfying sauce.
Another popular application is using pan-seared chicken tenderloin as a component in other dishes. They are excellent sliced and added to salads, pasta dishes, wraps, or grain bowls. Their tender texture and quick cooking time make them a versatile protein for busy individuals.
For those seeking even more flavor infusion, consider dry rubs or spice blends applied before searing. A Cajun-inspired rub with paprika, cayenne pepper, garlic powder, onion powder, oregano, and thyme is a classic choice. A Mediterranean-inspired rub might include dried rosemary, oregano, thyme, garlic powder, and a pinch of red pepper flakes. The key is to ensure the rub adheres well to the chicken, which is facilitated by a dry surface.
The presentation of pan-seared chicken tenderloin can also elevate the dining experience. Arranging the tenderloins attractively on a plate, perhaps drizzled with pan sauce and garnished with fresh herbs like parsley or chives, creates a visually appealing dish. Slicing them into medallions before plating can also add an elegant touch, showcasing the juicy interior and the golden-brown crust.
Troubleshooting common issues is an important aspect of mastering pan searing. If the chicken is sticking to the pan, it’s usually due to a few reasons: the pan was not hot enough, the chicken was not dry enough, or the pan is of poor quality and doesn’t distribute heat evenly. If the chicken is browning too quickly on the outside and not cooking through, the heat is too high, or the tenderloins are too thick. Reducing the heat and potentially finishing in the oven are solutions. Conversely, if the chicken is taking too long to cook and is becoming dry, the heat is too low, and the sear is not developing properly.
The versatility of pan-seared chicken tenderloin extends to its dietary adaptability. For those following gluten-free diets, ensure any breading or marinades used are gluten-free. For low-carb or ketogenic diets, focus on marinades and rubs that are free from added sugars.
In conclusion, pan-seared chicken tenderloin is a foundational cooking technique that, when executed correctly, yields exceptional results. The combination of proper preparation, heat management, and attention to detail allows for the development of a flavorful crust and a moist, tender interior. Its adaptability to various flavor profiles and its suitability for a range of culinary applications make it an indispensable tool in any home cook’s repertoire. Mastering this simple yet elegant method opens the door to countless delicious and satisfying meals.
